Wednesday, April 3, 2013

WIP Wednesday - April 3, 2013

I have several WIPs this week, unfortunately there hasn't been much progress on any of them!

My largest ongoing project is the Philippians 4:8 Wall Hanging I am making with printed burlap and Urban Mod by AGF. 


I haven't progressed very much since my post about it last Wednesday. I still haven't even decided if I am finished with the first block. I can't decide if I want to make the above block wider, or just start on the next one. I was out of town over the weekend... And I got distracted by another WIP... 

On Monday I was looking around the living room and thinking I am ready for Spring, but I need some Spring decorations to brighten it up. 

I bought some PB&J by BasicGrey for Moda a few weeks ago when I stopped by a LQS. 


Honestly I had seen this fabric online, but it didn't stand out to me at all, but when I saw it at the LQS I fell in love. I had no idea what I was going to do with it, but bought a charm pack and a couple of fat quarters. 

I know my pictures aren't the greatest, but once I saw this fabric close up and felt it, I just wanted to eat LOL. 


I decided that a table runner for the coffee table and a few pillows for the couch would do the trick. I have been rather busy with work and the kids so I haven't made as much progress I had hoped. 

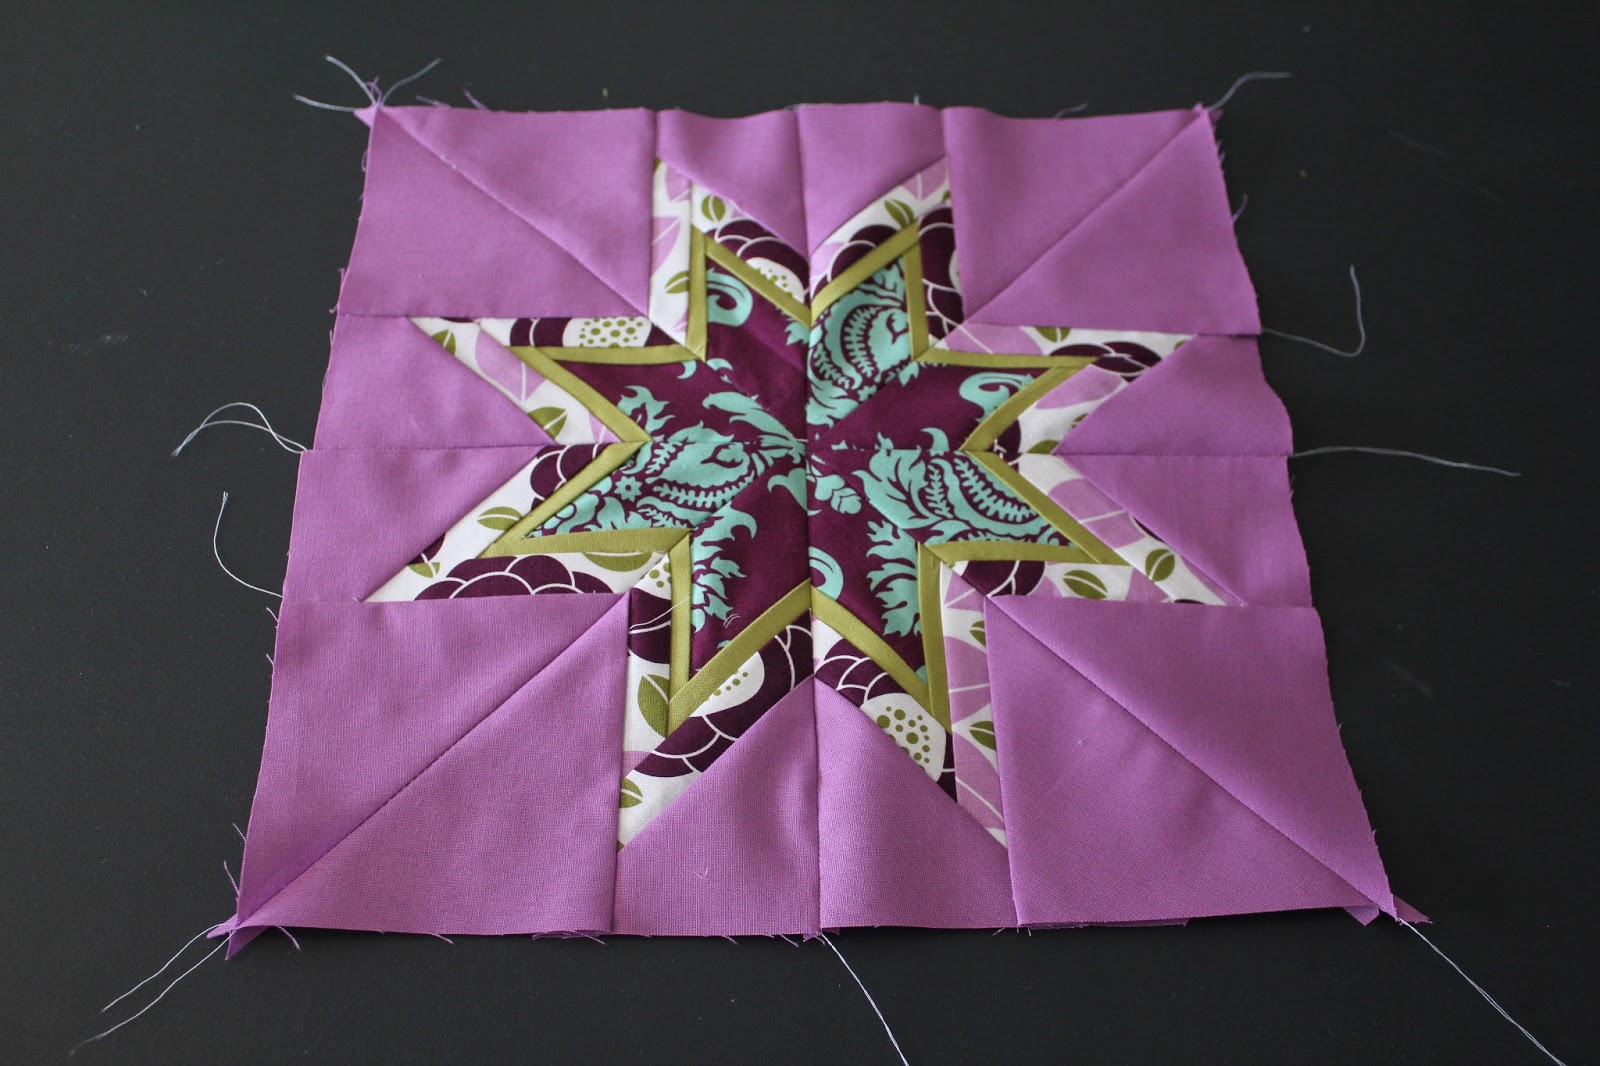
Center of the Table Runner


I still have my SkillBuilders BOMs that I am working on, again not much  progress since the last time I posted about them. I have only finished piecing the first 4, two more came out almost two weeks ago, so I need piece those, as well as quilt them. 


The other project I need to finish up are these appliqued onesies. I started making them for my nephew and a friends baby back in August... Yes, back in August. I got 6 months done for each of them and went ahead and gave those to their mommies. Now I really need to get the other ones made and given to them!!! I really should do that ASAP. 


Oh yes, I almost forgot... I won a fabric giveaway last week!!! I got the email on Friday. Thank you Ashley from Cherished Bliss and Southern Fabric for the Charm Packs of Marmelade and Happy Go Lucky! 

I am linking up with Freshly Pieced WIP Wednesday hosted by Greenleaf Goods


WIP Wednesday at Freshly Pieced

Monday, April 1, 2013

Mom's Lilac Diamond HST Quilt


Basically since I started blogging, I have been working on a quilt for my mom. I ordered the fabric for this quilt several months ago because I knew it would be perfect for a quilt for my mom. I didn't have a design in mind when I ordered the fabric, so I ordered half yard pieces of all of the fabric, a bit more for some of the prints that I really loved.

This summer I fell in love with Joel Dewberry's Aviary 2, and yes I have made quilts using all three color palettes.

Joel Dewberry Aviary 2 - Lilac 


 In February I decided I make a HST (Half Square Triangle) quilt and make a diamond design radiating out from the center. I actually went with an off-centered diamond rather than directly in the center.

To make the quilt large (over sized full or small queen) enough I needed 168 HSTs. That is a lot of cutting! I cut 5.5 inch squares of the fabric. I organized my squares into piles of light and dark values. I then put one dark with one light value, right sides together and drew a line down the center. I sewed quarter inch seams on each side of the line. After sewing all of them I cut down the middle, to give me two triangles. I pressed all of the seams open (I hate that part). I then had HSTs with light on one side and dark on the other.


 Because I ordered my fabric before knowing what I was going to do, the process wasn't as smooth as I would have liked. I would have focused on making sure I had a more equal amount of dark and light values.

I did most of the cutting in February, and then started working on the London Minus the Red quilt that I made for a friend. At the beginning of March I decided to really start working on Mom's Lilac Diamond quilt as I am calling it. I wanted it finished by Easter weekend, as my family would be meeting up with my parents and my sister's family in Branson, MO for the weekend and I wanted to give it to her at that time.


Once I had all of the HSTs I trimmed all of them up, as I wanted them to be perfectly square. I had a nice pile of scraps, I thought they were so pretty.


I then started laying out the HSTs to figure out their exact placement. That took a whole afternoon. I also, had a little hiccup, because I layout my quilts on the ping pong table and it just wasn't quite wide enough, the quilt wound up being a bit longer and narrower than I prefer. Pretty close to the shape and size of a ping pong table LOL.

After I sewed all of the HSTs together I added a narrow inner border, and a wider outer border. I backed it with Pond Kona Solid. 


I had never machine quilted something this large, so it was slightly difficult for me. I broke two needles because the weight of the fabric was pulling on the needle. I wound up moving my machine to the ping pong table so that I could use it to hold up the fabric. Thank goodness for that ping pong table in my "sewing nook!" 

I chose just to follow the design of the quilt and stitch in the ditch using my walking foot.


It created a nice design on the back. I bound it by hand, using left over 2.5 inch strips of the fabric, although I through in some Olive and Violet Kona Solid as well.

So here it is! It is a LOT of color, but my mom loves it.


Center of Mom's Lilac Diamond Quilt


My mom, her quilt, and Lone Starburst Pillow


Wednesday, March 27, 2013

WIP Wednesday - Improv Wall Hanging

WIP Wednesday at Freshly Pieced
Linking up with Freshly Pieced for WIP Wednesday. 


About a year ago I decided to try a Pinterest idea and use my home printer to print words on burlap. I printed some words from Philippians 4:8 (Pure, True, Lovely, Right, Honorable, Excellent, and Admirable), which is a favorite verse of mine. It turned out fairly well, although I almost destroyed my printer, when the burlap got caught and wound up around the rollers inside it. I hot glued and stapled the the burlap to OSB (thin plywood) cut to size and hung them on a very blank wall in my living room. I always had in mind to paint that wall something bold as a backdrop for the burlap plaques... Fast forward a year or so, other decorative additions to the living room and the burlap plaques weren't working for me, they were a tad on the boring side. 


I saw Urban Mod by Art Gallery Fabric and I fell in love. I decided a wall hanging made from the fabric to mostly cover that wall would be lovely. I ordered several Kona Solids to go with the Urban Mod, two shades of gray, olive, and canary. I don't know if I will use the Kona Canary it is a bit bright. Now I am incorporating the printed burlap into a wall hanging. I am going completely improv on this one.  


I tacked up some batting on the wall of my sewing nook, started cutting strips of my fabric, and started piecing my first block yesterday. I backed the burlap in muslin before sewing any fabric to it, to stabilize it. 


I assume this will be my main WIP for a while.

PS. I completely finished my mother's Lilac Diamond Quilt and will be giving it to her this weekend. I plan to post all about it on Sunday or Monday! 

Monday, March 25, 2013

Lone Starburst Quilted Pillow


I posted about my first paper pieced project, a Lone Starburst out of Joel Dewberry's Aviary 2 in Lilac as well as some Kona Solids Olive and Violet. I decided to turn that 12.5 inch block in a larger block and quilt it.

 I added 3 inch borders... Although after I quilted it I wound up trimming them down. I used a high loft batting and muslin for backing.


I followed the seam of the star burst and then I decided to venture outside of my comfort zone and use my walking foot to follow the outline of the star. I think it turned out very nicely. The high loft batting caused the star burst itself to "poof" up a little and it looks nice.


I loved the way the back of it turned out, unfortunately that is hidden inside of the pillow now. I will definitely be making this block again and quilting it the same way so that the back can be seen because I really love this. 


I used Pond Kona Solid for the back of the pillow. I used recycled stuffing from an old pillow that we weren't using... and Voila!


A simple matching pillow for the Lilac Diamond Quilt. 


Saturday, March 23, 2013

Paper Piecing First

My big March project, my mother's Lilac Diamond Quilt (a full blog post with lots of pics will follow after I give my mom the quilt next weekend!), is quilted and I am binding it by hand now. 


The fabric I chose for the Lilac Diamond Quilt is so beautiful, I really wanted to make something else with the leftovers, but the colors are so vibrant and busy, I hadn't quite decided what I should do. I have been seeing some beautiful work done with paper piecing, I know its been around for centuries, but I was unfamiliar with the technique until recently. I decided now was the time to play around with it. I found this beautiful template for a Lone Starburst on Six White Horses and I downloaded the pdf file. Honestly I didn't know where to begin. I had no clue about paper piecing. I searched around the web for a tutorial, but honestly didn't find anything that I really followed well. So I just started experimenting. 

You need 4 As and 4 Bs to make one Starburst:


After some trial and error, I realized a few things, just going to list them out below:

1. Put the fabric on the back of the paper, and sew on the lines on the front.

2. Decrease your stitch size if you want to get the paper off without ripping out the seems from the fabric!

3. The first piece of fabric needs to face right side up, while all of the others are right sides together. Which means wrong side facing you.  


4. Use big enough scraps of fabric, this is great for using up tiny pieces, but don't just "hope" its enough because then you are using your seam ripper a LOT and its really tough to pull out the seams because your stitches are so small! 

This is NOT a tutorial, those are just a few pointers. I don't feel qualified to be giving anyone lessons on paper piecing at this point, BUT it was tons of fun. After a LOT of trial and error, ripping out a LOT of seams, realizing that my pieces of fabric were NOT big enough... I managed to get the 8 sections made for my Lone Starburst. I worked on this Thursday evening and Friday evening!

1 of 8 Starburst Sections

1 of 4 A/B Sections

My eight sections before I sewed them!

After I finished my 8 sections, I wasn't sure if I was supposed to piece them together with the paper still on, or if I took the paper off and then just lined up my seems and sewed the pieces together... I went with the latter. It worked out okay. My seems weren't perfect, but they looked pretty good and I was pleased, as it was my first paper piecing attempt and I did it all on trial and error. 


One A/B Section Sewn Together

My Lone Starburst! 


Saturday, March 16, 2013

I Won a Giveaway and Quilt Expo

I enter fabric giveaways all the time. So many bloggers out there and their sponsors are very generous with some beautiful fabric! I didn't have much time to enter many, but last Friday/Saturday I participated in a Blog Hop Party hosted by Michelle at the Quilting Gallery.

There were over 200 Bloggers that participated, I did NOT have the time to enter all of their giveaways, so I entered the ones whose blogs started with a "J" and I scanned the list for bloggers in Missouri, hoping to possibly get to know some nearby quilters.

I WON!!!

Krista at Sew What's Cooking was giving away 6 Fat Quarters of Timber and Leaf by Sarah Watts for Hawthorne Threads. I can't believe that I won them!

On top of all of that Krista mentioned the The Thimble and Thread Quilt Expo in St. Louis in her post announcing the winner. And... I actually have today free, so I am going to head up there!


... Also, I have been working on my Skill Builder Block of the Month by Pile of Fabric and I have pieced three of the four. The instructions for the next two blocks will be out next Thursday... So I still have the fourth the piece and I have to FMQ (Free Motion Quilt) all of them, but I am catching up!

Block One


Block Two


Block Three


I am sticking to my promise to use scraps! I did have to order the white background fabric and I will have to order more of it because that will be used throughout the entire quilt, also, I need to figure out what I will use for the backing before I can begin quilting each of these. I have been wanting to try the QAYG (Quilt As You Go) Method, so I am definitely going to choose that option for quilting these. 


Pile O' Fabric

That's all for now!


Wednesday, March 13, 2013

New Fabric and WIP Update

Today I received some new goodies in the mail that I ordered on Friday!!! Ohhh how I love little bundles of new fabric and I definitely don't receive them enough :>)

I ordered some Urban Mod by Art Gallery Fabrics from Hawthorne Threads.


I am going to make a wall hanging for my living room with these fabrics, the design is still a "thought in progress!"

I have been eyeing Rock N Romance by Pat Bravo for Art Gallery Fabrics as well for some time, and it is about going going gone! So I decided I must have a few pieces for myself....


I ordered 4 half yard prints, and of course after I got them I kind of wish I would have ordered a couple more prints. 

Then Canton Village Quilt Works was having 10% off Kona Solids, so I ordered some grays and a white. They will go nicely with my Urban Mod wall hanging. 


I wanted to order some more colors, but I thought my money would be better spent on a Kona Color Card so that I could match solids with the prints I buy for quilts. I really needed it for my current WIP because I haven't bought the backing for it yet. 


So it is WIP Wednesday is it not? I think I might give a little peak at how my mom's Aviary 2 - Lilac Value Quilt is coming along... 

The 168 HSTs (Half-Triangle Squares) are sewn together, the narrow inner border is almost completely finished, and just the outer border to go before the top is complete! The picture below is of the center of the quilt, where the first four squares join and work their way out. 


Quilt Center


Also, I found this challenge that I thought I would share... 

It is not just a quilting challenge, it is a craft of any sort. They give the theme on the 15th of the month, and then you create your project, and submit it by the 15th of the next month. The first challenge begins on March 15th. Looks like fun... I just might do this!


Le Challenge